Connect a Device
Sharing is Caring
Congratulations! You've completed enrollment and agreed to the terms of your program. In the next section, we'll walk you through connecting a device and sharing data with your care team. You're almost done!
Your "To-Do's"
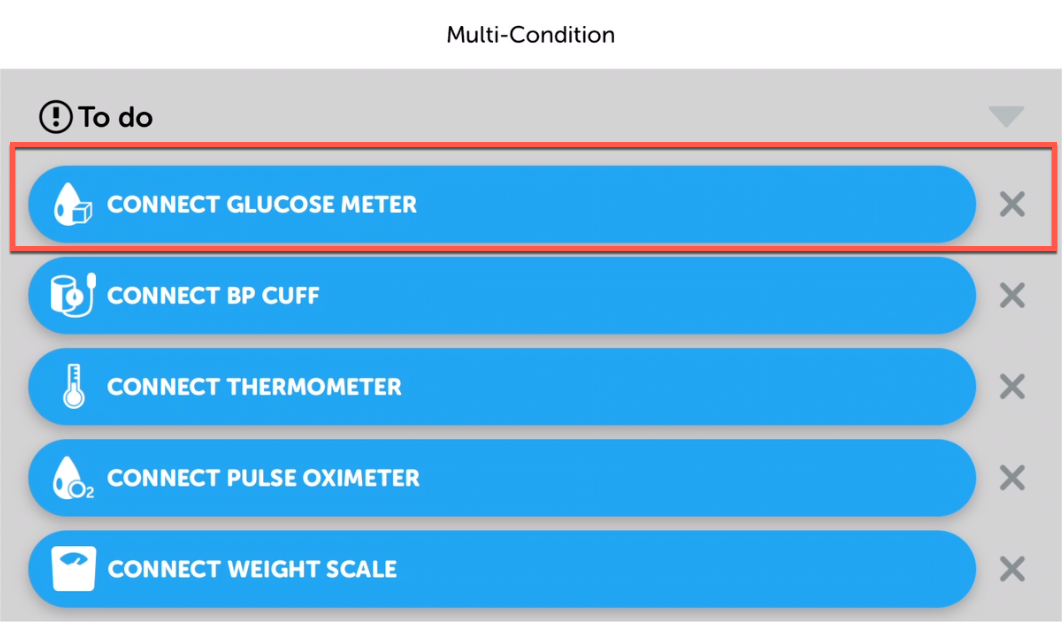
As you move through the setup wizard, you see a "To-do" section. This is where you will start to connect your required device(s).
Device Connections Limitations
- Only 1 device can be connected for each measurement type (blood pressure, weight, temperture, etc) within a program.
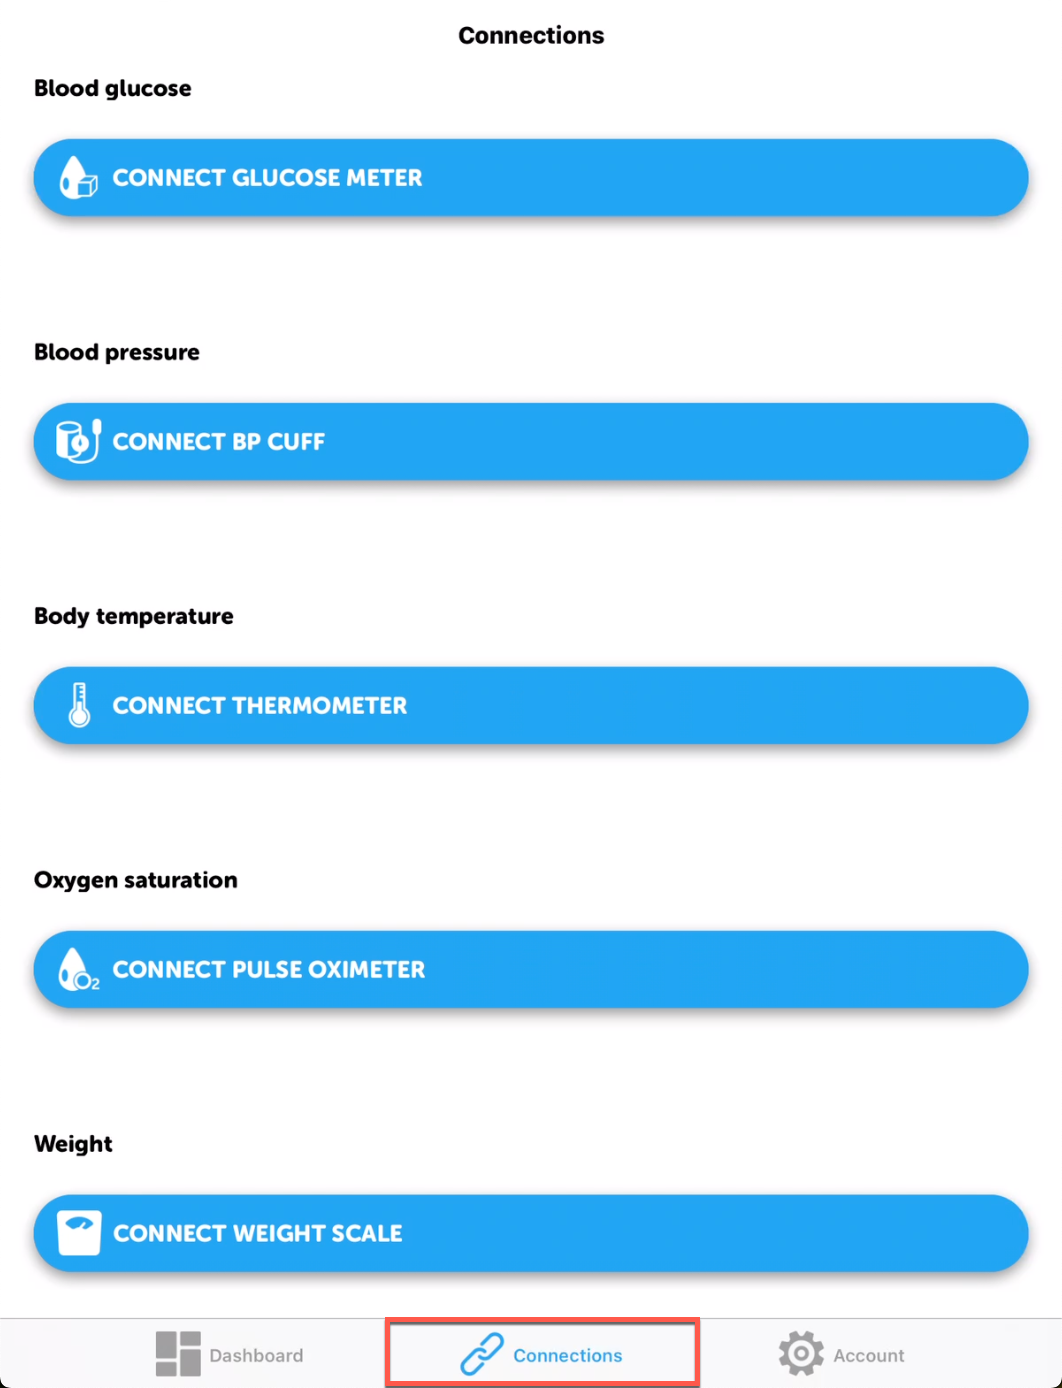
- Connection to-dos can only be dismissed if manual data entry is supported in your program. If you dismiss a connection to-do, you can still go to the connections management section of the side menu to connect a device at any time.

NOTE: To-Do dismissal (Close "X" next to each connection to-do) will only appear if Manual Data Entry has been enabled for your programs organization.
"To Dos" - App Badges and Reminders
Notification Permissions
HealthBridge will ask you to enable notifications for the app to communicate with you and remind you of important tasks related to your health. When asked, please enable notifications so the app can better help you. If you ever want to update your app notification settings, you can do this from HealthBridge's app listing in your phone's setting menu.
App Badges
With notification permissions enabled, HealthBridge will display a badge on the app icon, typically with a counter with the corresponding number of to dos in the app (some Android phones will display a dot on the app icon, and not an actual count of "to do" tasks within the app).

Similar to messaging and email apps, these app badges are there to call attention to the app when tasks are available to you for follow up within the app. After you complete your "to dos," the badge will disappear from the app icon.
"To Do" Reminders
With notification permissions enabled, HealthBridge will send a push notification periodically to remind you of incomplete "to dos" in the app. If those "to dos" are completed, those task reminders will stop.
Select a Device
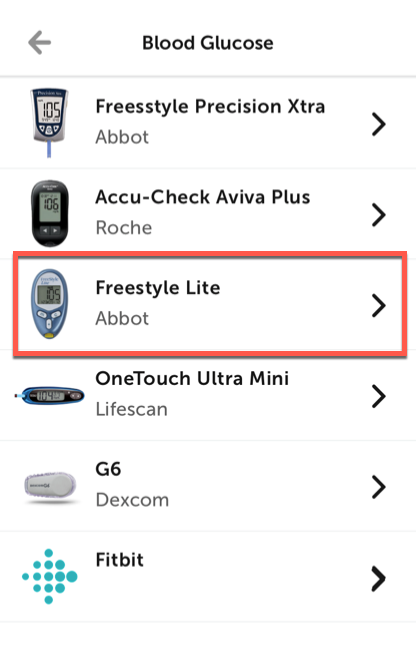
In the next phase (If you choose to connect a device right away), we present a list of supported devices. These devices are specific to your organization's particular program. Select your device from the list.

Supported Devices
Please see the below page for supported HealthBridge devices and sources:
https://help.validic.com/space/VCS/1665335325/Connected+Apps+and+Devices
Glucometer Note: Is your device here but not in HealthBridge?If your device is in the following list but you do not see it in the HealthBridge app, please use the "My [device type] Isn’t Listed" option in the app to pair your device.
For example, if you want to pair a supported glucose meter that's not in the app's device list, select the "My Glucose Meter Isn’t Listed" option and follow the app's instructions.
- ACCU-CHEK Aviva Connect Glucose Meter
- ACCU-CHEK Guide Glucose Meter
- ACCU-CHEK Instant Glucose Meter
- Ascensia Diabetes Care US Inc - Contour Next One
- Ascensia Diabetes Care US Inc - Contour Plus One
- Nipro TRUE METRIX AIR Glucose Meter
Connect your Device
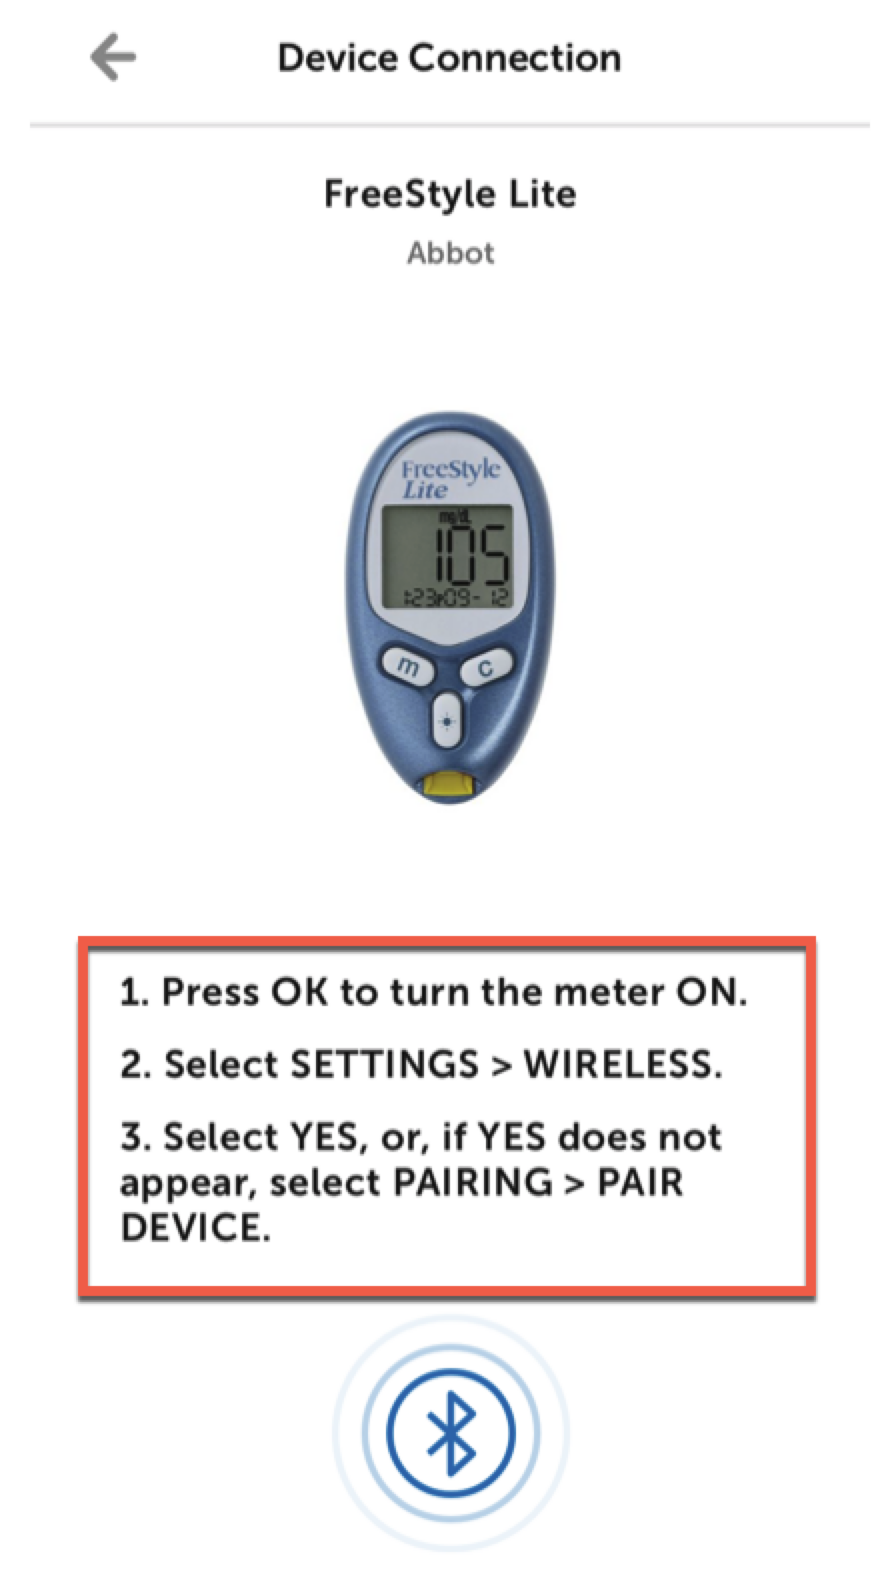
Depending on the type of device you've selected, you'll either be directed to pair or authorize access to your data. Regardless of the connection method, instructions guide you along the way. Below is an example of pairing a BlueTooth device to your HealthBridge App.
Note: The device pairing experience will vary slightly when using the HealthBridge app on iOS vs. Android.

After you've paired your device, you will be asked to take a new reading to confirm that HealthBridge can communicate with your device.
Your synced data will be automatically shared with HealthBridge whenever you take a new measurement as long as the HealthBridge app is running in the background and you have a stable internet connection.
Paring IssuesIf you encounter problems pairing, please review the owners manual for your device. If pairing issues persist, please reach out to you physician's office for assistance.
Android Duplicate Pairing Requests (Android 10 and earlier)If using Android 10 or earlier, you may experience duplicate pairing requests when pairing a peripheral to HealthBridge. This is a limitation of the OS, and the peripheral will still pair and read correctly.
Managing Device Connections
Once you have connected a device for a measurement type, you can view, disconnect, or reconnect it via the connections management area. To access connections management, click the hamburger menu icon in the top left of the dashboard screen and then click "Connections."

Updated 3 months ago
